
by Stephen | Jun 7, 2021 | Woodworking Projects
As a woodworker, you may have realized that finding the right detailed plans to build some custom projects to meet specific needs can be very difficult. This is among the most common problems woodworkers face today, but luckily for you, this and other related problem shouldn’t bother you.
At TedsWoodworking.com, Ted Mcgrath, a certified master woodworker, trainer, and author gives more than 16,000 plans, with step-by-step blueprints for various woodworking projects.
So what’s TedsWoodworking all about?
Building complex projects or even the simple ones to meet specific needs can be very difficult even to experienced woodworkers especially when you can’t find a detailed plan. And most of the so-called “step by step” guides found online and in various magazines make building some projects harder than it should be. This is because the plans are sometimes not specific enough or their instructions leave out crucial information assuming that you have enough experience to know what to do.
In addition, often, such plans don’t have enough detail. For instance, some don’t include pictures or the pictures they have don’t match what they are telling you. Still, some don’t even include cut sheets, so you are forced to “guesstimate” materials.
Ted Mcgrath spent over 25 years studying these problems and finding solutions. He put together a comprehensive collection of wood-working plans. Tedswoodworking.com is his website which offers woodworkers solutions to various woodworking problems, especially those related to finding the right plans for various projects. The site has detailed plans for over 16, 000 projects. Every plan comes with a step-by-step blueprint to make it easier for you to create stunning, professional wood-working projects hassle-free, quickly, and easily.
Who is TedsWoodworking for?
If you are a woodworker looking for detailed plans to start building your dream projects, or if you want a variety of plans for various unique projects, then tedswoodworking.com has you covered. The website has helpful insights for both beginner woodworkers and the more experienced ones.
Why you should check this out
Occasionally, you are presented with a challenging project, for instance, a customer comes and wants something custom-made for them. Without having a detailed plan, it may be very difficult to build such projects quickly and be able to meet your customer’s needs. TedsWoodworking comes in handy, providing you with a variety of plans with complete easy-to-understand instructions.
You will also get new insights and learn new tricks of completing projects even if you do not have expensive tools or a large woodworking workshop. And given the wide range of projects and complete plans available on the website, you no longer need to spend days or months looking for someone to complete a project for you. You will build even the most challenging projects yourself.
Here are a few things the site has to offer:
- Easy-to-understand step by step instructions; Every plan has simple “hold-you-by-the-hand” instructions that will assist you to complete your projects quickly.
- Materials and Cutting lists ensuring that you get the right materials and make correct cuttings. This saves you a lot of money.
- You get sharp, colourful and detailed schematics. No guesswork is involved, you will know what to do and how to do it and complete your projects within the shortest time possible.
- The plans give you views from all angles. You will see how everything should look like before you start building. The intricate details for every joint, angle and corner make sure you are not left guessing.
- Various lists of plans (16,000+). In addition, you will also get new plans every month for free.
The plans cover all levels of competence and skills. You don’t have to be an expert wood-worker or have expensive tools and machinery to use the plans.
Whether you are a pro woodworker, an amateur, or a beginner with hand tools, you will find several projects suitable for you.
What You Won’t Like about Teds Woodworking?
Although Teds Woodworking has a lot of good things to offer, it has also some flaws. Since this contains thousands of plans, it takes time to download it, particularly if your internet speed isn’t up to mark.
Nevertheless, this advantage may be nullified if you choose the DVD version of Teds Woodworking. You’ll have every plan in a portable DVD and you don’t need to spend time in front of your computer to download the pack.
But, if you pick the DVD version, you’ll have to wait several days for the shipping. Aside from that, organizing a total of 16,000 plans isn’t a simple task. You do need to utilize the search option to locate the plan you're looking for.
Why Should You Choose Teds Woodworking?
If you are planning to purchase 16,000 plans individually, it’ll cost you loads of money. However, Ted is offering everything for a limited launch price of only $67.
Thousands of woodworkers are using his plans to create awesome stuff out of wood. It's now you turn to get in on the action

by Stephen | Apr 30, 2021 | Woodworking Projects
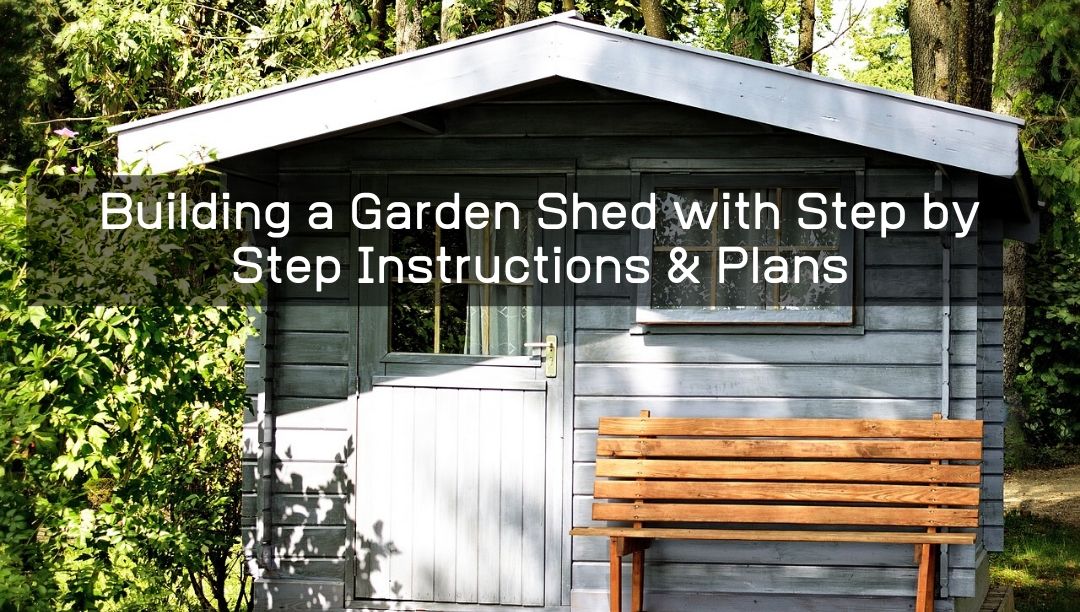
A garden shed serves as an excellent storage space where you can safely keep all your garden and lawn-related equipment such as leaf blowers, watering cans, lawnmowers, and many others. It is also super multipurpose, which makes it a highly useful addition to your backyard. You can even store BBQ supplies in a garden shed, which greatly prevents the hassle of moving them from one place to the other.
Most garden sheds are made of wood, which makes them incredibly durable and long-lasting. One great thing about wooden sheds is that they look super chic, and you can paint them your favorite color or create patterns to add a customized effect.
If your backyard doesn’t have a shed, you can easily build with from scratch. While building a garden shed isn’t an easy project, especially for beginners, you can still make one with the help of free woodworking plans available online. These plans also allow you to access garden shed plans PDF files that are easily downloadable on your laptop or computer.
However, if you are looking for a quick, step-by-step guide on how to build a garden shed right now, here’s an easy one for you with proper instructions and steps.
Step 1: Gather Essential Tools
First things first, you need to gather all the essential tools, supplies, and materials that you’d need to build a garden shed. These include the following:
- Hammer
- Wooden stakes
- Wood glue
- Sandpaper
- Carpenter’s pencil
- Hand saw
- Step ladder
- Safety equipment
- Wood clamps
- Wood chisels
- Screwdrivers
- Measuring tape
- Screws and nails
- Wood chisels
- Nail gun
Step 2: Cut the Wood
Once you have all the supplies in place, the next step is wood-cutting. You need proportionately-cut wooden pieces for four main things:
- Garden shed floor
- Garden shed ramp
- Garden shed door
- Garden shed base
Depending on how big or small you want your garden shed to be and also the amount of space you have available, cut the wooden boards accordingly.
Step 3: Triangular Roof Brace
If you’ve noticed, most garden sheds have a triangle-shaped roof brace, so it’s best to stick to that shape only. You first need to draw out the pattern or shape for the roof brace on a piece of plywood. You will require four different boards to make a vertical triangle.
Step 4: Build the Foundation
In order to protect your garden from moisture and other similar weather-related factors, you need a strong gravel foundation, which will greatly help keep the shed dry.
First, layer an adequate amount of gravel on the ground and smoothen it out with the help of a shovel. Then, place concrete blocks in evenly spaced-out rows on the gravel, followed by playing wooden boards on top of concrete blocks. Join the boards together with the help of a nail gun and some nails.
Step 5: Create Shed Walls
Once you have a solid foundation ready, move on to creating the walls for your garden shed. With the help of a chalk line, mark a platform that you wish to use a support for the back wall of the shed. Make sure the lines are parallel to each other by taking measurements at different points.
Then, lay out the wooden boards that you had cut earlier for the back wall and join them together with the help of the nail gun, hammer, and nails.
Repeat the same step for the side walls as well.
Step 6: Build the Door and Front Wall
To make the garden shed door, begin by creating a door frame. Use the wooden boards to mark the height of the door as well as the width. Nail the boards into place in order to form the frame.
Now, use this garden shed door frame to build the front wall. Keep the door in place in order to determine the size of the front wall. Cut a board in a way that it fits the top of the door frame perfectly. Cut another piece of board that goes from the previous board all the way to the top board of the wall frame.
Step 7: Nail the Roof Brace to the Side Walls
Take the triangular roof braces that you created earlier in step 3 and nail them to the top of the side walls.
Next, take a drill and start nailing all the walls together. Get someone to help you to raise the back wall in order to nail it in place. One by one, lift all the wooden walls that you created and nail them securely with the help of the drill and nails.
Step 8: The Roof
At this point, you should have a fully structured, standing-up garden shed, but without the roof. Create the roof by nailing a wooden board towards the top of the front and back walls. This will help provide a brace for the rafters that you need to place towards the sides of the board. Place a rafter on each end of the roof and make sure that they are evenly spaced out.
Step 9: Install the Door
The last thing left for you to do is install the door by attaching hinges on both the walls and the door. You will also have to drill a hole into the door to put in the latch.
Step 10: Paint the Shed (optional)
This is an optional step, but if you want, you can paint your shed with the help of outdoor latex paint. Painting gives it a smooth finish and also makes it look super pretty!
Now that you know how to build a garden shed, you can create your own without any problem. For your help, there are many free woodworking plans, and garden shed plans PDF files that are very detailed and laid out simply for your understanding.

by Stephen | Apr 25, 2021 | Woodworking Projects
During the cold winter months, if you don’t have an electric heating system (or even if you do), there’s something comforting about warming yourself up in front of a warm fire. But you don’t want to leave your firewood outside where the cold winds, sleet, and snow will make it soft and difficult to light.
Read on as we unfold a step-by-step guide to build a firewood shed on your own that will be strong enough to withstand rough weather and will protect your wood supply from the elements.
Sourcing Firewood Shed Plans
Before you start making your shed or cutting the wood, you need a proper plan to follow. You can find a number of websites such as Ted’s Woodworking where you’ll have access to different shed designs with varying levels of difficulty. Select the plan that works best for you and acquire the amount of wood needed to complete the design.
DIY Firewood Shed
We’ve outlined the basic steps of building any type of firewood shed, from a simple rack to a double story shed that can stand without being supported by the wall of your house:
Step 1: Collecting Your Tools & Supplies
Before getting started, you’ll need to gather all the necessary equipment and raw materials to build the shed, including:
- A firewood shed plan
- Ladder
- Saw
- Tape measure
- Set Square
- Marker
- Sawhorse
- Power drill
- Protective goggles and earmuffs
- Wood
- Sander & sandpaper (optional)
- Concrete blocks (optional)
- Screws
- Brush (optional)
- Paint (optional)
Step 2: Prep Yourself
Before you start sawing, drilling, or whatever else is required, you need to get ready for the project. Wear old clothes that can be discarded and make sure they cover you completely to avoid wood splinters or anything else from scratching your arms or legs. Put your safety goggles on (and your earmuffs when you start using the drill), and you’re set.
If you can find a hardhat, it’s a good idea to wear it for extra safety. Keep a first aid kit nearby in case of emergencies.
Step 3: Cut the Wood to the Right Sizes
The plan that you’ll be following will guide you on the size of the wood. The wood will be divided into different categories, including wood for the:
Use your set square, ruler, and a marker to mark the wood. Place the wood sheet onto the sawhorse, and once it’s secure, cut it using the saw.
Step 4: Smooth Out the Wood
If the pieces of wood are very rough, you may need to use a sander and sandpaper to smooth them out. If you’ve bought wood sheets that are pre-sanded or don’t wish to spend any more time or effort on your firewood shed, you may skip this part. However, if the wood is rough, be ready for any jagged bits that may poke you as you work or when you try to get wood from the shed.
Step 5: Build the Wood Frames for the Firewood Shed
Following the plans you’ve selected, arrange the wooden slats to make the frame for each segment of the shed, including the floor and the walls. Drill screws into the framework to secure the pieces of wood into place.
If you’re using a plan where the shed is open from the top and front, then you don’t need to prep any wood for the door and the roof.
Step 6: Set Up the Foundation of the Shed
If you’re building your firewood shed as more of a rack against the wall by the door, you don’t need to prep the base.
However, for a shed standing on its own, you’ll need to build a solid foundation that won’t budge even if there’s heavy rain or snowfall. This is where the cement blocks come into place. On the spot where you intend to set up the shed, dig up some of the earth to create an indent in the ground. Using a set square and a ruler, place the cinder blocks according to the woodworking plan. Add the wooden base on top of this.
Step 7: Complete the Basic Structure of the Shed
Using a power drill and screws, secure the walls onto the foundation of the shed. If you’re planning on dividing it with a shelf in between to separate the different logs of wood, add the center slab of wood at this stage.
Step 8: Add the Roof
If you need additional protection for your firewood, you may need to add a roof. The good thing with a firewood shed is that a simple, single slanting frame will suffice. Prepare the wooden frame the same way you did for the walls and the floor and secure it onto the walls with screws and a power drill.
Step 9: Paint the Shed (Optional)
Although firewood sheds are generally not painted, you may want it to match the exterior of your house. If that is the case, clean the shed thoroughly to get rid of any small bits and pieces. Once you’ve painted the shed, let it dry completely before storing the wood in it.
Build a Shed That Is Functional
Throughout the process, make sure you use the right materials and a good power drill to ensure that the structure of the firewood is strong enough to deal with heavy rain, etc. In humid climates, most people prefer to add a roof and a door to prevent the moisture from ruining the wood. If you live in a climate that isn’t generally humid but is facing a bout of heavy rain, you can use plastic sheeting on top of your shed to keep the wood safe.
Different plans offer designs that combine functionality and style. Some sheds are pyramid-shaped to make taking the wood out easier without causing the domino-effect. Others are divided in half vertically or horizontally to separate the flint wood from the firewood.

by Stephen | Apr 16, 2021 | Woodworking Projects
Coffee tables are low tables that act as a convenient support for your beverages, remote, magazines and other bits of items that you want to access while sitting. While coffee tables are thought to have been designed as early as the Renaissance, this style of furniture first become widespread during the Victorian Era in England and has since then become a ubiquitous part of homes ever since.
If you are looking for a coffee table for your home, why not design one yourself! Coffee tables are very easy to construct and don’t require expert knowledge in woodworking to build. Here’s a step by step guide on how to make a coffee table.
Continue Reading
Table of Content
- How to Build a Coffee Table
- Tools & Material You Need
- Step 1: Decide on the Dimensions
- Step 2: Cut the Board to the Right Length
- Step 3: Stick the Top Together
- Step 4: Secure it With Screws
- Step 5: Create the Apron
- Step 6: Further Secure It in Place
- Step 7: Building the Stand
- Standard Four Leg Design
- Single-Leg Design
- Step 8: Sand the Surface
- Step 9: Stain or Paint the Wood
- Step 10: Add a Finish to Your Coffee Table
- Tip & Warning
- Avoid Damaging Your Floor
- Use a Finishing Wax with Light Paint
- Wear Protection
How to Build a Coffee Table
Tools & Material You Need
Here is a list of all the tools and materials you will need for the project. Improvise where you don’t have the item in the checklist.
- Power Drill
- Tape Measure
- Stain
- Polyurethane or Polyacrylic Finish
- Paint
- Paint Brush
- Clamps
- Pencil
- Wood Glue
- Ruler
- Piece of cloth
- Sanding Block
- Sand Paper
- 3 Inch Screws
- Power Saw
Step 1: Decide on the Dimensions
For your DIY coffee table, the first step would be to decide on the dimension of the coffee table you want to build – how wide, tall and long. Ideally, your coffee table should be at a height that allows for convenient access of items on it whiling your sitting on the sofa or chair in front of it. For this example, we will be making a 48 in x 28 in x 18 coffee table.
Step 2: Cut the Board to the Right Length
Using a table measure and a pencil, make the desired lengths on the boards and cut them using a power or table saw. For this example, you can use standard 2×8 for the tabletop and apron. You will need:
- Two 52 In
- Three 22 In Pieces
- Ten 28 In Pieces (extra two optional)
- In the case of the legs, you can 4×4 boards
- Four 18 in Pieces
Step 3: Stick the Top Together
Using wood glue, carefully stick the 2-inch sides of six 28-inch boards together so that they form one large rectangular board. Make sure that the 8-inch sides are in an even line on both ends. Use clamps to firmly hold them together until the glue tries.
Alternatively, you can cut or order a 48×28 piece of plywood for this purpose and skip to step 5.
Step 4: Secure it With Screws
Use two of the remaining four 28-inch boards as a means to firmly secure the tabletop. Place them underneath it exactly 4 inches away from the opposite ends of the 28-inch sides. Place them so that both of them lie across all the tabletop pieces. Use a power drill to carefully screw 3-inch nails into both of these boards, one or two secure into each piece of the tabletop on both sides.
Alternately, you can use the old-fashioned way and just hammer straight nails into the board but this method may require a bit more woodworking skill to achieve flawless results.
Step 5: Create the Apron
An Apron provides further support to your coffee table and also helps improve its overall aesthetics. Use the last two of the 28 in boards and glue them on their 8-inch side at 90 degrees with the tabletop. Take two 52 in long boards and apply a similar procedure for the longer two sides of the tabletop. These two boards are 4 inches longer than the sides so that they also cover the length of the shorter pieces used in creating the apron.
Make sure that the top of the apron is at even level with the top side of the table. Use clamps to secure them in place until the glue dries.
Step 6: Further Secure It in Place
Using a power drill and 3-inch screw nails, firmly secure the apron in place. As an optional measure, you can add greater structural integrity to the coffee table by adding support beams. Do this by gluing two 28-inch boards on their 2-inch sides at even distance from the center, ideally at 13 inches from it on the opposite ends. Once the glue dries, secure them in place with screw nails.
Step 7: Build the Stand
Now that the top part is complete, it’s time to build the support it will stand on. Here we will be giving two design options. The easier standard four leg design and a slightly more complicated single-leg design. Proceed with the type that suits your preferences the most.
Standard Four Leg Design
Attaching them to the tabletop is a straight forward process. Individually place the legs at the extreme sides of the inside of the tabletop, in the 4-inch space between the apron and the support boards. The 4×4 should fit in snugly but if it doesn’t just use a 320 coarse-grit sandpaper to smoothen the surface of the 4×4 until it does so.
Apply glue at the top end of the 4×4 as well as the inner sides of the apron which will touch the board. Repeat the same process with the rest of the three and secure them in place with clamps. Once dried, get your power drill and uniformly screw in the nails. Afterward, if the foot of the table feels uneven, you may sand them until all of them are leveled.
Single-Leg Design
For this design, instead of four 18-inch 4×4, you will need:
- One 18-inch piece
- Four 12-inch pieces
- Two 9-inch pieces
- Two 10-inch pieces.
- Seven 5-inch screw nail
First mark down the exact center of the table. You can use the tape measure and a pencil to find the spot. Now stick two 10-inch 4×4 at the foot of the leg and once dried, secure them firmly using screws and a power drill. At the ends of the 10-inch boards, glue two 12-inch boards so that that foot makes a 12×10 rectangle. Wait for it to dry and secure it with nails.
Afterward, before you glue and secure the leg to the center of the table, create the support first. Using a pencil and a ruler, create a 4×4 square around the center mark. Glue two 12-inch 4×4 on the opposite sides of the square so that they are parallel to the 28-inch side of the table.
On the longer 52-inch side, glue two 9-inch 4×4 so that fit in between the boundary of the square and the support beams. Now finally, add glue on the top end of the leg and snuggly if it in between the support on the marked square. It should fit in snuggly but if it doesn’t, just sand it until it does. Once the glue
dries, screw a nail from the top, through the table and into it.
Step 8: Sand the Surface
Before you can apply a finish, it is recommended to sand the surface of the wood to make the coating process easier. Use a 320-grit sanding block to smooth all the surfaces of the coffee table. Thoroughly work across the furniture so to ensure there is no sharp edge or uneven surface remaining. This process can feel tiresome but it is essential if you want the best result out of your hard work.
Once you are done with the process, use a cloth to wipe off any dust, lint or residue that may have been left on the table.
Step 9: Stain or Paint the Wood
If you want to give your coffee table a rich, rustic appearance, coat it with a light or dark stain. However, if you want to have the coffee table look as it is instead, consider skipping to step 10.
Began by gently dipping the paintbrush into the stain, allow the excess liquid to drip off and work in a smooth back and forth stroke to apply an even coat of stain. Wipe off the excess with a piece of cloth and wait for the stain to dry for 7-8 hours before applying a second coating.
If you truly want a vintage look to your coffee table, consider applying a light stain for the top and a darker one for the log(s).
Instead of staining the coffee table, you may want to have it colored. Began by coating the table surface with a thin layer of primer and wait 1-2 hours for it to dry completely. Primer makes it easier for the paint to stick to the surface and retain its original color. For those hard to reach surfaces such as the interior side of the tabletop, you can use a spray-on primer.
Using long back and forth strokes, apply the paint evenly over the surface. Leave it to dry for a day before applying a second coat. For a distinct look, you can paint the tabletop and legs a different color of the paint. Let the paint cure for three to seven days before proceeding with the next step.
Step 10: Add a Finish to Your Coffee Table
Now with the rest of the process done, it is time to apply one final step to our coffee table and that is to apply a finish, which will help make the wood more durable and better protect it against moisture. In a well-ventilated area, apply a polyurethane or poly acrylic finish evenly over the surface. Wait for it to dry for 3-4 hours before applying a second coat.
For the finish, you can choose between semi-gloss or matte. A semi-gloss finish is more durable and easier to clean, making it ideal if you are placing the coffee table in high traffic or moisture-heavy environment such as your kitchen, living room or outdoors. A matte finish, on the other hand, gives off a better look and better manages to hide any imperfections. However, it is also harder to clean and overall, less durable.
Tips & Warnings
Avoid Damaging Your Floor
The hard and edged wooden surface of the table leg(s) can damage the flooring. Attach felt at the bottom of the leg(s) to avoid such predicaments.
Use a Finishing Wax with Light Paint
A polyurethane or Poly acrylic finish will tend to yellow over time, making less them than ideal for use if you have painted your coffee table with a lighter color. Instead, consider using a finishing wax for the purpose. Apply the wax with a clean cloth and leave it to dry for an hour. Repeat the process 3-4 times for the best results.
Wear Protection
Whenever working with power tools and wood, make sure to always wear adequate protection. Wear goggles to protect your eyes from dust and any wood shatter. When sanding or painting, make sure to wear a filter mask and if possible, work in a well-ventilated area.
We hope you found this DIY coffee table guide to be useful. Consider sharing it with others who may also find it useful. Have you worked on any woodworking project that you are particularly fond of? Share more details about it with us in the comments below.

by Stephen | Apr 16, 2021 | Woodworking Projects
Cabinets are furniture featuring doors, drawers, or a mix of both meant to hold miscellaneous items. A well-designed cabinet can combine both form and function, offering itself as both a practical storage facility and contributing to the overall aesthetic of your room, kitchen, office or bathroom.
However, you will find in the markets ready-made, and even ready-to-assemble, cabinets to be quite expensive. A good quality cabinet can easily cost you thousands of dollars. Save up on cash by considering a DIY cabinet project in your spare time. This step-by-step guide will instruct you on how to build a wood cabinet easily without requiring expert knowledge or skill in woodworking.
Table of Content
- Stuff You Will Need
- Safety First!
- How to Make a Cabinet
- Step 1: Plan the Dimensions
- Step 2: Cut the Pieces
- Step 3: Create the Skeleton
- Step 4: Add the Walls
- Step 5: Secure the Structure with Nails and Joints
- Step 6: Install the Shelfs
- Step 7: Create the Cabinet Doors
- Step 8: Attach the Cabinet Doors
- Step 9: Adding Some Finishes
- Step 10: Paint or Stain the Cabinet
- Step 11: Add a Protective Coating
Stuff You Will Need
Here is a list of stuff you will need for the project. Consider improvising where you fall short of an item on the checklist.
- 1 ¼ Standard Plywood (or any suitable wood)
- Wood Glue
- Power Drill
- Screws
- Corner Brackets
- Tape Measure
- Sanding Paper
- Framing Square
- Furniture Knob
- Magnetic door latch
- Clamps
- Paint brush
- Sealant
- Stain or Paint
- Hinges
- Ruler
- Pencil
- Jigsaw
Safety First!
Before starting with making a wood cabinet, be considerate of your safety. While working on the woodworking project, lint or sawdust can enter your eyes, causing irritation or even injury. You should always wear safety glasses while working with wood.
In addition, to prevent sawdust or any chemical particulates from entering your lungs, be sure to also wear a reliable mask filter, especially if working in an unventilated area. If the equipment you use is too loud, it might also be beneficial to wear earmuffs. When painting or staining the furniture, also make sure to wear plastic gloves.
How to Make a Cabinet
Step 1: Plan the Dimensions
First, consider the dimension of your DIY cabinet. How large would you want it to be? Are you aiming for a small cabinet to hang on the wall of your bathroom or kitchen? Or would you want a large cabinet for your living room that also acts as a tabletop for putting various items? Here is a link (INSERT LINK to your plans/ DELETE LINE if none exists) to some free woodworking plans for making cabinets.
For this example, we will be making a versatile 2 ft x 1 ft x 3 ft cabinet, which you can use either as a small tabletop or to hang over the counter.
Note: To avoid any confusion with the dimensions, all the ones listed here go in this order – Length x Width x Height
Step 2: Cut the Pieces
Using a tape measure, a ruler and a pencil, outline the dimensions of the cabinet pieces and cut them using a jigsaw. If you don’t have one, you can use a standard hand saw as well but unless you are skilled with its use, you may find it a bit difficult to achieve a uniform cut. However, even if you are unable to do so, don’t worry; if the uneven cut isn’t too big, you can use a sanding paper to sand it even.
You will need to cut the following out of the plywood:
For the Skeleton
Four 36’ x 2’
Four 12’ x 2’
Four 24’ x 2’
For the Walls
Two 12’ x 36’
Two 24’ x 36’
Two 24’ x 12’
For the Shelf
One or Two 22’ x 10’
Step 3: Create the Skeleton
You have the option to skip this step and simply attach the walls together. However, creating a skeleton is recommended if you want your cabinet to be more durable and last a long while.
Like a picture frame, the sides of thin facing panels would need to be angled at 45 degrees so that they fit into each other perfectly. Cutting plywood at an angle is a bit more challenging and with some practice, it gets easier to get it right.
Place the plywood at a level surfaced table and using a framing square and a pencil, locating the center line between the two sides of the 90-degree framing square and mark the 45-degree angle on the plywood. Afterward, using clamps hold the facing panel firmly in place. Carefully, using a jigsaw, cut the plywood along the marked age. Work slowly to ensure that you are cutting straight along the marked line.
Afterward, the process is pretty straightforward. Simply apply wood glue to the frames and stick them together. Use clamps to hold them firmly and wait for them to dry.
Step 4: Add the Walls
Once the skeleton is firmly dried, its time to add the walls. Add wood glue over the skeleton and carefully secure the walls to all sides except the front (more on that in later steps). Use clamps to hold them in securely and wait for the glue to dry.
Step 5: Secure the Structure with nails and Joints
Using a power drill, screw nails of appropriate length into the structure so as to secure the wall to the skeleton. Install corner brackets inside on the skeleton to reinforce the joints.
Step 6: Install the Shelves
Using your tape measure and a pencil, measure and level locations for 4 or 8 corner brackets depending on whether you want a single or two shelves for your cabinet. Using the power drill, screw the end of the corner brackets facing the cabinet walls. Afterward, make appropriately sized cuts to the front-facing skeleton frame so as to slide in the shelves snugly into the inside of the cabinet.
Step 7: Create the Cabinet Door
The front-facing wall will serve as your cabinet door. However, you have plenty of options at your disposal to make it more interesting and useful. If you intend on handing the cabinet, consider attaching a mirror on the cabinet door. Or, you can add to its aesthetics by printing a high-quality picture, securely gluing it on to the cabinet door and afterward, inserting a wood and glass frame over it. Alternatively, if you have enough woodworking skills, create a basic design out of the wood, sand it smooth with sanding paper and glue it on to the door. Get creative and add a personal touch to the cabinet door according to your preference.
Alternatively, you can also create a two-door cabinet variant. The process is pretty much the same. The only difference is that you would need to follow most of the required steps twice for each door and would need to cut the front-facing wall into two equal portions.
Step 8: Attach the Cabinet Door
Attach two hinges to one side of the inside wall of your cabinet and screw them in firmly. Afterward, attach the door to them and screw it as well. If you leave the cabinet as it is right now, you will see that the door doesn’t close shut at all.
For this, you will need to attach a magnetic door latch, which you can easily find in many hardware stores. Attach the magnetic part to the inside of the cabinet and the metal part of the extreme side of the door so that when closed, both parts attach perfectly together. For a two-door version, attach the latch parts at the top of the door and cabinet inside instead. Glue a very thin wood panel on the inside of one of the doors that would shut first so that just one magnetic latch would be needed to close them both.
Step 9: Adding Some Finishes
Your cabinet is nearly done. Now is the time to add some finishing touches. To easily close and open your cabinet, install a furniture knob. Alternatively, you can try creating a knob or handle yourself but then the task would become a lot more complicated so stick with what is simple.
If you want to hang the cabinet, you would also need to install two hangers at the backside of the cabinet. If you want to fix it in place on the wall, consider screw hangers. However, if you would like the flexibility of hanging it anywhere, D-ring hangers would be suitable.
Alternatively, if you want the cabinet to also act as a tabletop, you should instead attach legs to it. Legs will help keep the structure elevated above from any moisture present on the floor and also prevent the cabinet from scratching the surface of your flooring when you move it around. Ready-made furniture can be purchased from the market and are very to install.
However, you can also make your own legs for the cabinet by cutting four 4’x 4’ x 4‘ blocks from wood boards. Before attaching them to the cabinet, smoothen their edges with sandpaper and glue a layer of felt around them. Afterward, use wood glue on the exposed surfaces of the blocks to stick them to the bottom of the cabinet and wait for it to dry. Screw them in place using your power drill and long nails screwed through the inside surface of the cabinet into the blocks.
Step 10: Paint or Stain the Cabinet
You may want your finished cabinet to look even better by adding a coat of paint or stain over it. Start by covering any parts of the cabinet with a newspaper or tape that you don’t want coated e.g. the front mirror in case you installed it onto the cabinet door.
Before getting started with either paint or stain, sand the surface of the cabinet to make it ready for the coatings and to smoothen out any uneven surfaces. Use a piece of rag to wipe away any dust left afterward.
To stain the cabinet, choose an oil-based stain and conditioner. Using a paintbrush, carefully apply a thin layer of conditioner on to the surface. Wait 10 to 20 minutes for it to get absorbed and wipe away the excess with a rag. Wait an hour for it to become fully dried and apply a thin, even layer of stain. Let it sit for 5 to 15 minutes and wipe away the excess. Wait a few hours before applying a second coat. For a more vintage look, coat the door with a dark stain and rest of the cabinet with a lighter one.
Alternatively, to paint the cabinet, prepare the cabinet for painting by first applying a layer of oil-based primer. Once it is fully dried, apply an even coating of paint onto the surface. Use an unloaded paint for the tipping process. Wait for a day for the paint to fully dry before applying the second layer of coating.
Step 11: Add a Protective Coating
Your finished cabinet would require a protective coating so to ensure it is better able to withstand punishment from the element and continue looking good as new for longer. Very lightly sand the surface of the cabinet and coat it with a suitable sealant. Wait for it to dry and repeat the process 1-2 more times.
Congratulations! You have made your own wood cabinet.
Page 1 of 912345...»Last »